Make a Silver Name Necklace
Learn how to make personalised jewellery
Personalisation in jewellery is very popular so I'm really pleased to share some of my own hints, tips and tricks in this FREE mini-course.
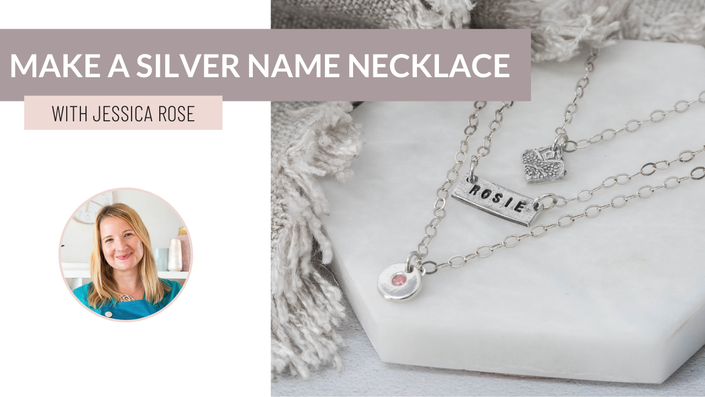
On this course you will learn how to personalise your silver jewellery with a name or important date, how to set a fireable birthstone and how to make a unique textured silver charm.

What is silver clay?
Silver clay is a material made from 100% recycled silver, a plant-based binder and a little water. It is a different way to work with silver as you can mould and shape it. Once dry you fire it with a jewellers torch (or a creme brule torch if you have one!) and it turns into solid, hallmark quality silver. It's modern alchemy! It's a fantastic material to make jewellery from home as you don't require a lot of specialist or expensive equipment to get started.
What Techniques are covered in this course?
- Using silver clay to make a personalised name necklace
- How to set a fireable birthstone
- How to make a unique textured silver charm
- How to fire your silver clay pieces (a creme brule or jewellers torch will do, no kiln necessary)
- How to polish and finish your pieces ready to wear!
& lots of tips and tricks along the way
This course is perfect for beginners - you don't need to have any experience of jewellery making or of working with silver clay in order to get started with these projects.

Your Instructor

Jessica Rose is a jewellery designer-maker and the Founder of Jewellers Academy and Jewellers Academy Brighton. She also founded the award-winning London Jewellery School, which was Europe's largest independent jewellery training company.
Jess is extremely passionate about jewellery making and loves supporting jewellers to run their own successful jewellery businesses.

Course Curriculum
-
StartCourse Notes: including tools and materials list PDF DOWNLOAD
-
StartLesson 1: Making a Silver Name Tag & Birthstone Charm (19:02)
-
StartLesson 2: How to Create a Textured Silver Clay Charm & Firing (16:56)
-
StartLesson 3: Polishing and Finishing (9:42)
-
StartBonus Video: How to Safely Fill Your Gas Torch at Home
-
StartBonus: Which Natural Gemstones Can Be Fired in Metal Clay?
-
StartEnjoyed this course? A great follow on course is Fingerprint Jewellery. Click here to find out more
This course includes:
- 3 Bite-sized video Lessons
- A complete set of downloadable course notes
- Tools and materials list
- Support in the Facebook group
Sign up below to get started making with us right away!
Tools and materials list
Tools
- Playing cards
- Teflon sheet
- Acrylic Clay Roller
- Art clay alphabet stamps (optional - it's worth getting 2 or 3 packs if you'll be using this technique regularly)
- Square and heart cutters (tip - look for sugarcraft cutters)
- Silver clay engraving tool/needle tool or cocktail stick
- Metal Tweezers
- Bowl of water
- Olive oil or badger balm
- Cling film
- Texture tile or another textured piece for imprinting on the clay (wallpaper/fabric etc)
- Pin vice drill with 1mm drill bit
- Sanding sponge
- Paintbrush
- Hotplate (optional)
- Heatproof fibre firing brick
- Jewellers torch/cooks torch
- Safety goggles (optional, recommended)
- Brass bristle brush
- 3M polishing papers
- Glanol & polishing cloth
- Pliers - flat/chain nosed
Materials
- 7g Art Clay
- Fireable Gemstone (in this project Jess used a 3mm Round Cubic Zirconia)
- Silver chain
- Silver jumps rings (Jess used 8mm sterling silver open jump rings)
Join our community of jewellery makers and get excellent training and support for your learning. Sign up to a course today!
